With electric vehicles (EVs) becoming
more popular, many owners are looking for ways to reduce their carbon footprint
even further. One fantastic method is to install solar panels to charge your
EV. This not only promotes sustainability but also helps save on energy costs.
Here’s a straightforward, step-by-step guide to installing solar panels for
your EV, making the process easy and accessible.
Why Install Solar
Panels for Your EV?
There are several compelling reasons to
install solar panels for your EV:
Cost Savings: Generate your own
power and cut down or eliminate your electricity bill.
Environmental Impact: Lower your reliance
on fossil fuels and reduce greenhouse gas emissions.
Energy Independence: Produce your own
renewable energy and become less dependent on the grid.
Increased Property Value: Solar installations
can increase the value of your home.
Step-by-Step Guide to
DIY Solar Panel Installation
Step 1: Assess Your
Energy Needs
First, determine how much energy your
EV requires and how much power you want to generate. This depends on your
vehicle's battery size and your daily driving habits.
Calculate Daily Energy Usage: Check your EV's
battery capacity (in kWh) and estimate your daily energy consumption.
Estimate Solar Power Needs: Based on your location,
figure out the average sunlight hours per day. Use this to calculate the number
of solar panels you’ll need.
Step 2: Choose the
Right Solar Panels
Select solar panels based on your
energy needs, budget, and available roof space.
Types of Solar Panels: Monocrystalline
panels are more efficient but pricier, while polycrystalline panels are less
efficient but more cost-effective.
Panel Efficiency: Higher efficiency
panels generate more power but come with a higher price tag.
Size and Number of Panels: Determine the
number of panels you need based on their wattage and your energy requirements.
Choosing the right solar panels for your installation
Step 3: Prepare Your
Installation Site
Ensure your roof is suitable for solar
panel installation.
Roof Condition: Inspect your roof
for any damage or necessary repairs.
Roof Orientation and Tilt: Ideally, your roof
should face south and have a tilt angle equal to your latitude.
Shade Analysis: Make sure there are
no significant obstructions casting shadows on your roof.
Inspecting the roof for solar panel installation
Step 4: Install the
Mounting System
The mounting system secures your solar
panels to the roof.
Mark the Placement: Use a chalk line to
mark where the mounts will go.
Install Flashing: Attach flashing to
prevent water leaks.
Secure Mounts: Drill pilot holes
and secure the mounts to the roof rafters.
Installing the mounting system for solar panels
Step 5: Attach the
Solar Panels
Carefully place and secure the solar
panels onto the mounts.
Position Panels: Align the panels
with the mounts and secure them with bolts.
Electrical Connections: Connect the panels
in series or parallel, depending on your system design.
Wiring: Use appropriate
gauge wires and waterproof connectors.
Attaching solar panels to the mounting system
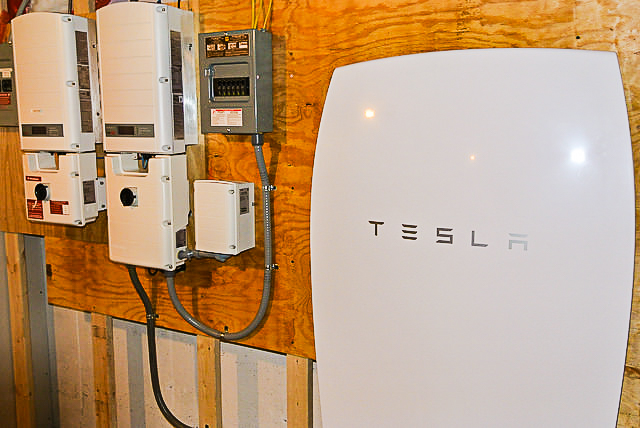
Step 6: Install the Inverter and Batteries
Convert the DC power generated by the
panels to AC power for home use and store excess energy.
Choose an Inverter: Select a suitable
inverter for your system (string inverter, microinverters, or power
optimizers).
Battery Storage: Install batteries
if you want to store excess energy for later use.
Step 7: Connect to
the Grid
Work with a licensed electrician to
safely connect your solar system to the electrical grid.
Grid Connection: Install a
bi-directional meter to track energy sent to and received from the grid.
Inspection: Schedule an
inspection with your local utility company to ensure everything meets code and
safety standards.
Step 8: Monitor and
Maintain Your System
Keep an eye on your system’s
performance and perform regular maintenance.
Monitoring: Use a solar
monitoring system to track energy production and consumption.
Maintenance: Clean panels
regularly and inspect for any damage or issues.
Practical Example:
Solar-Powered EV Charging Station
A great example of DIY solar panel
installation is setting up a solar-powered EV charging station at home.
Homeowners have successfully installed these systems to charge their electric
vehicles using solar energy. By following the steps outlined above, they’ve
managed to reduce their reliance on grid electricity and embrace renewable
energy.
Solar-powered EV charging station at home
Installing solar panels to charge your
electric vehicle is a rewarding project that promotes sustainability and energy
independence. By following this step-by-step guide, you can harness the power
of the sun to reduce your carbon footprint and save on energy costs. With
careful planning and execution, you’ll enjoy the benefits of renewable energy
for years to come.


Comments
Post a Comment